The Transparency Panel's Masking and Clipping Method - The Pros and Cons
Creative Member DESIGNチーム
Hello! It's been awhile!
Today I would like to share a handy trick with you all, which one of my colleague has taught me.
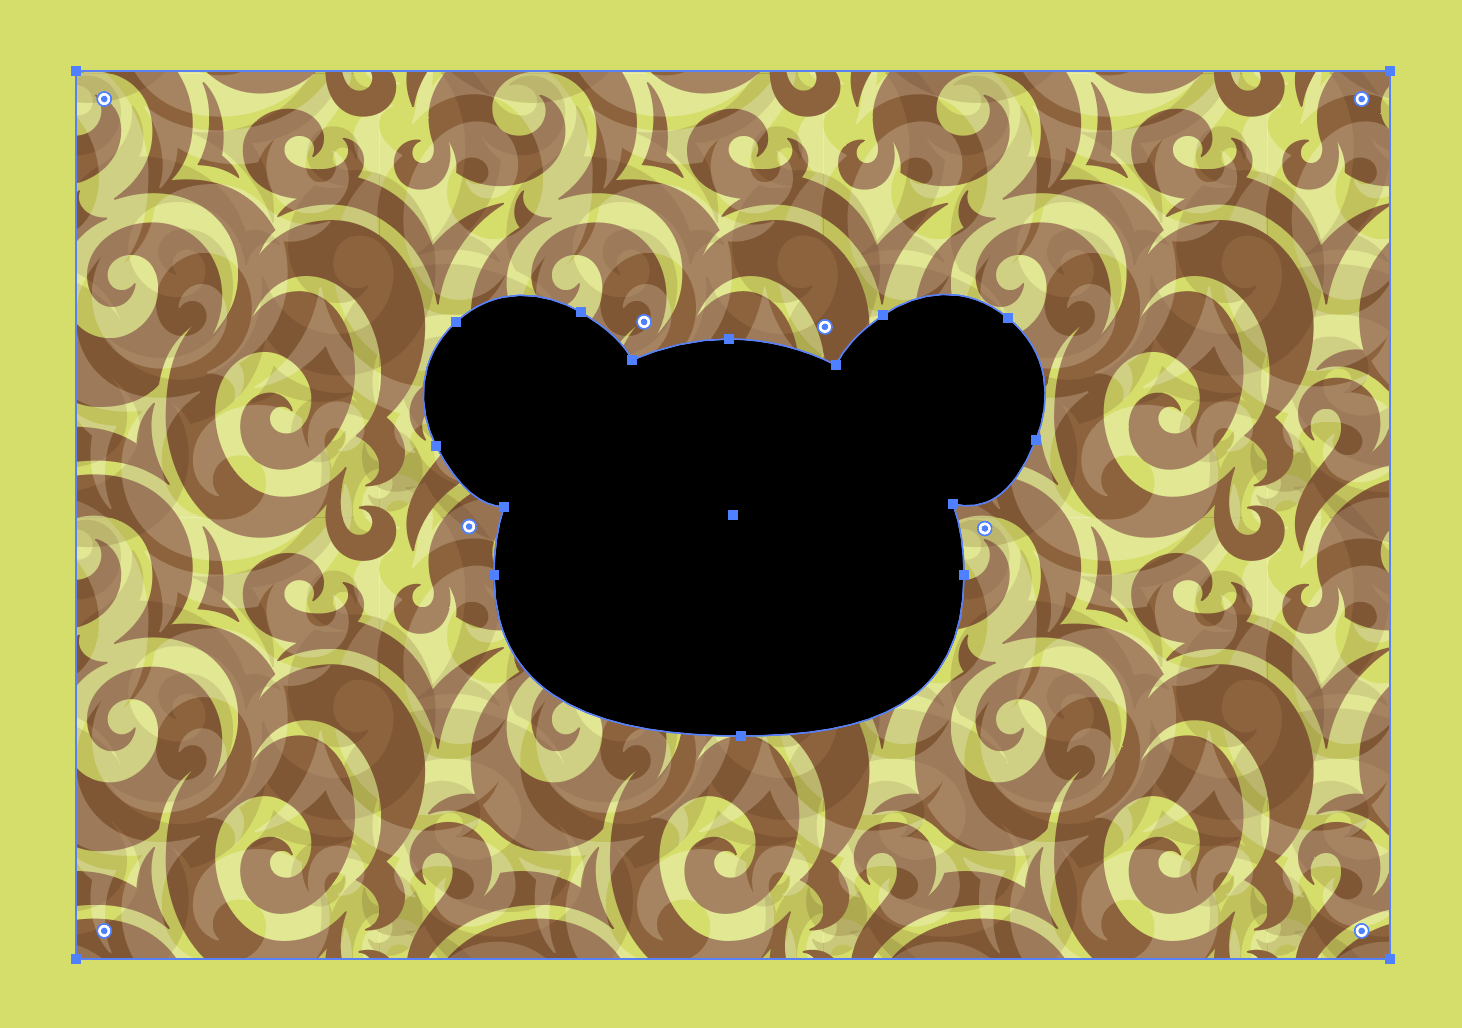
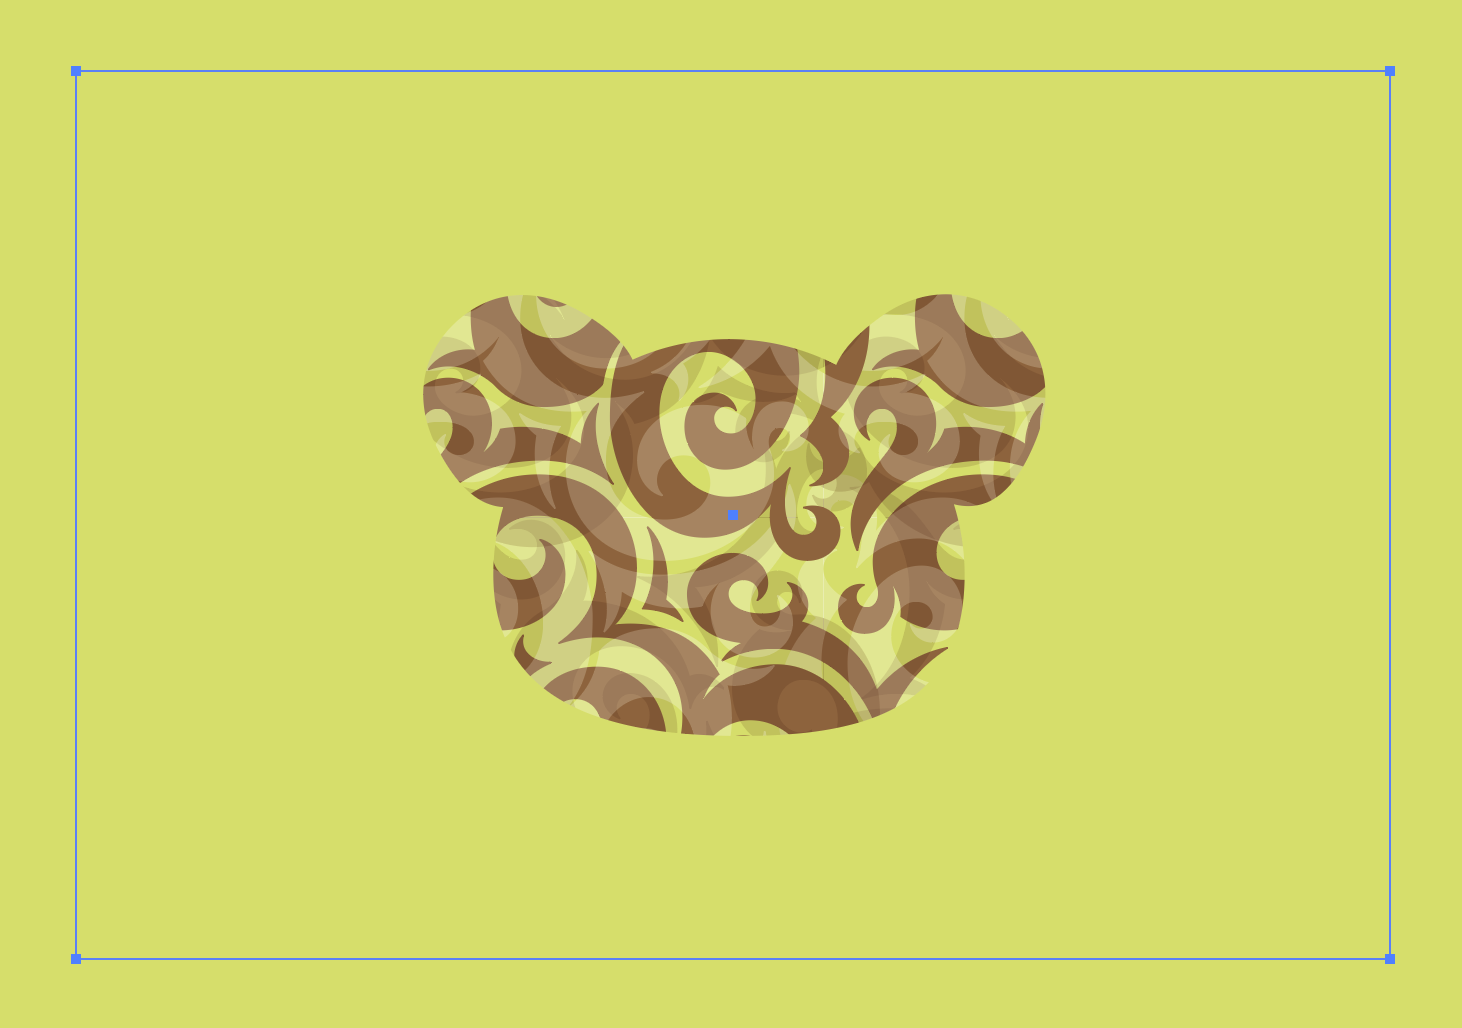
I'll be using the materials below to demonstrate the method.
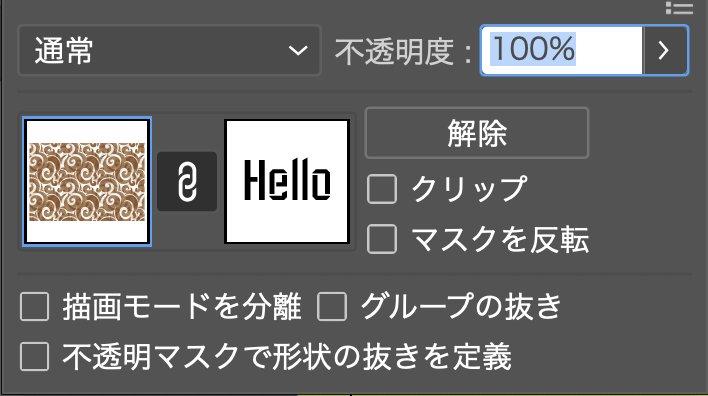
Select the items that you want to apply to the effect.
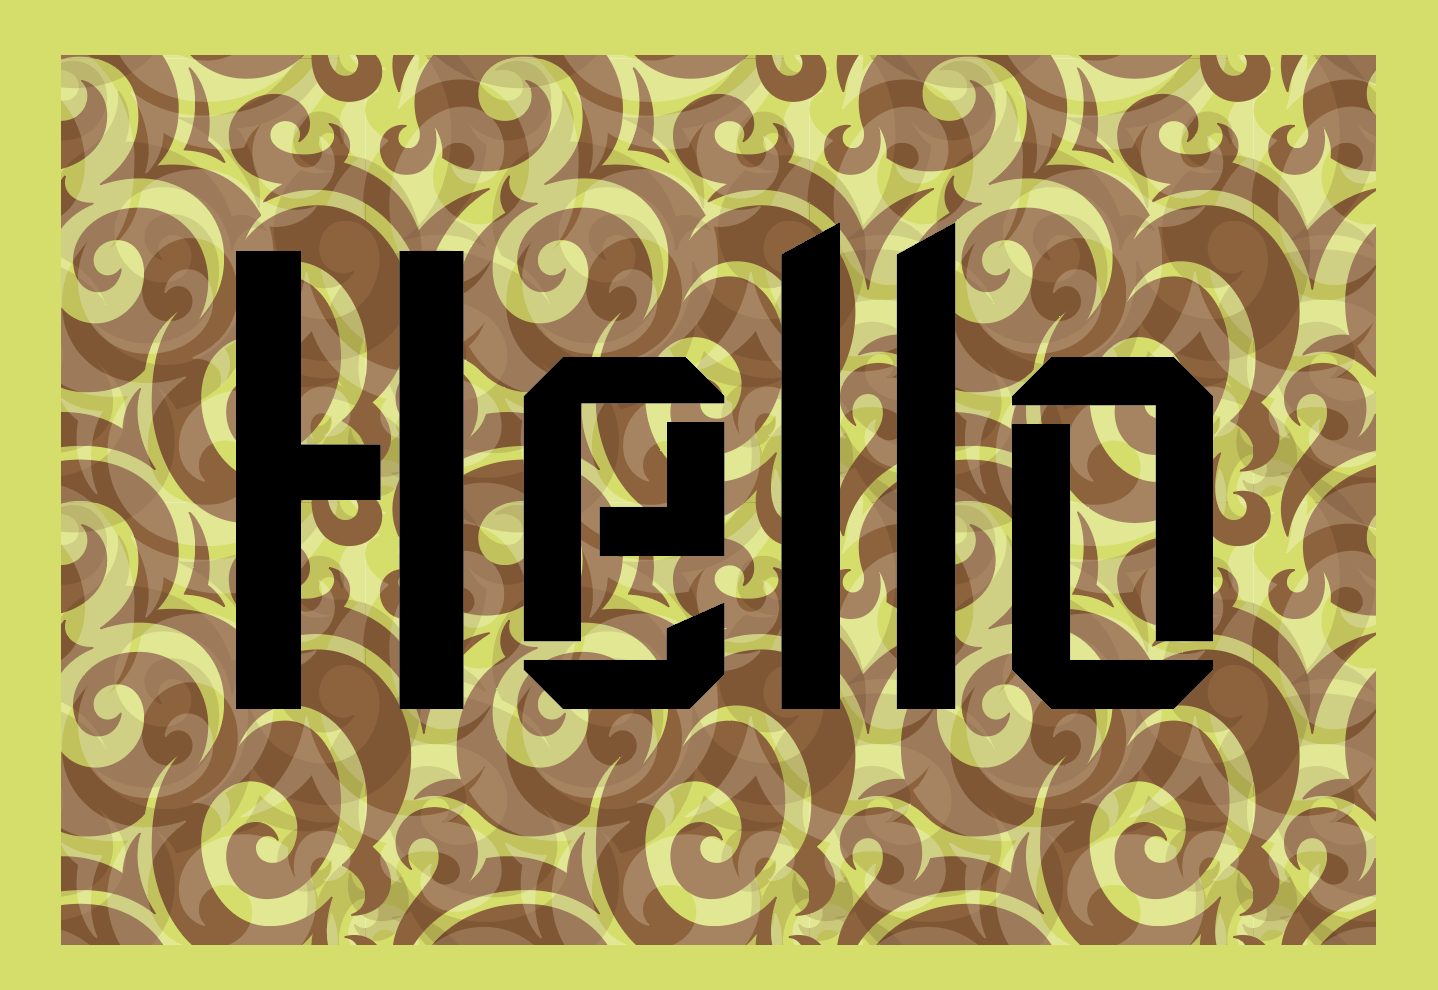
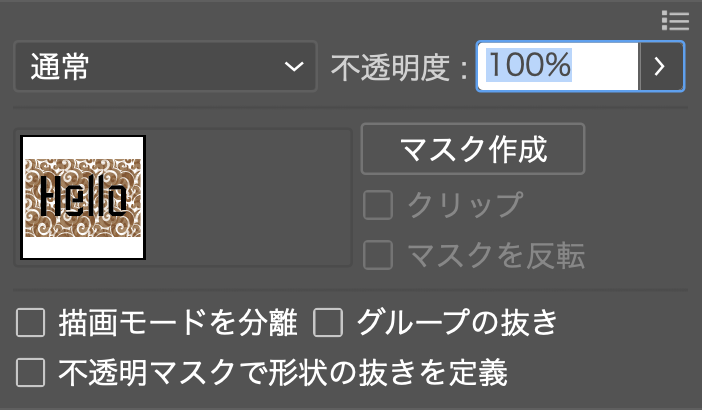
Then, press 「マスク作成」(Create Mask)
~before pressing「マスク作成」(Create Mask)~
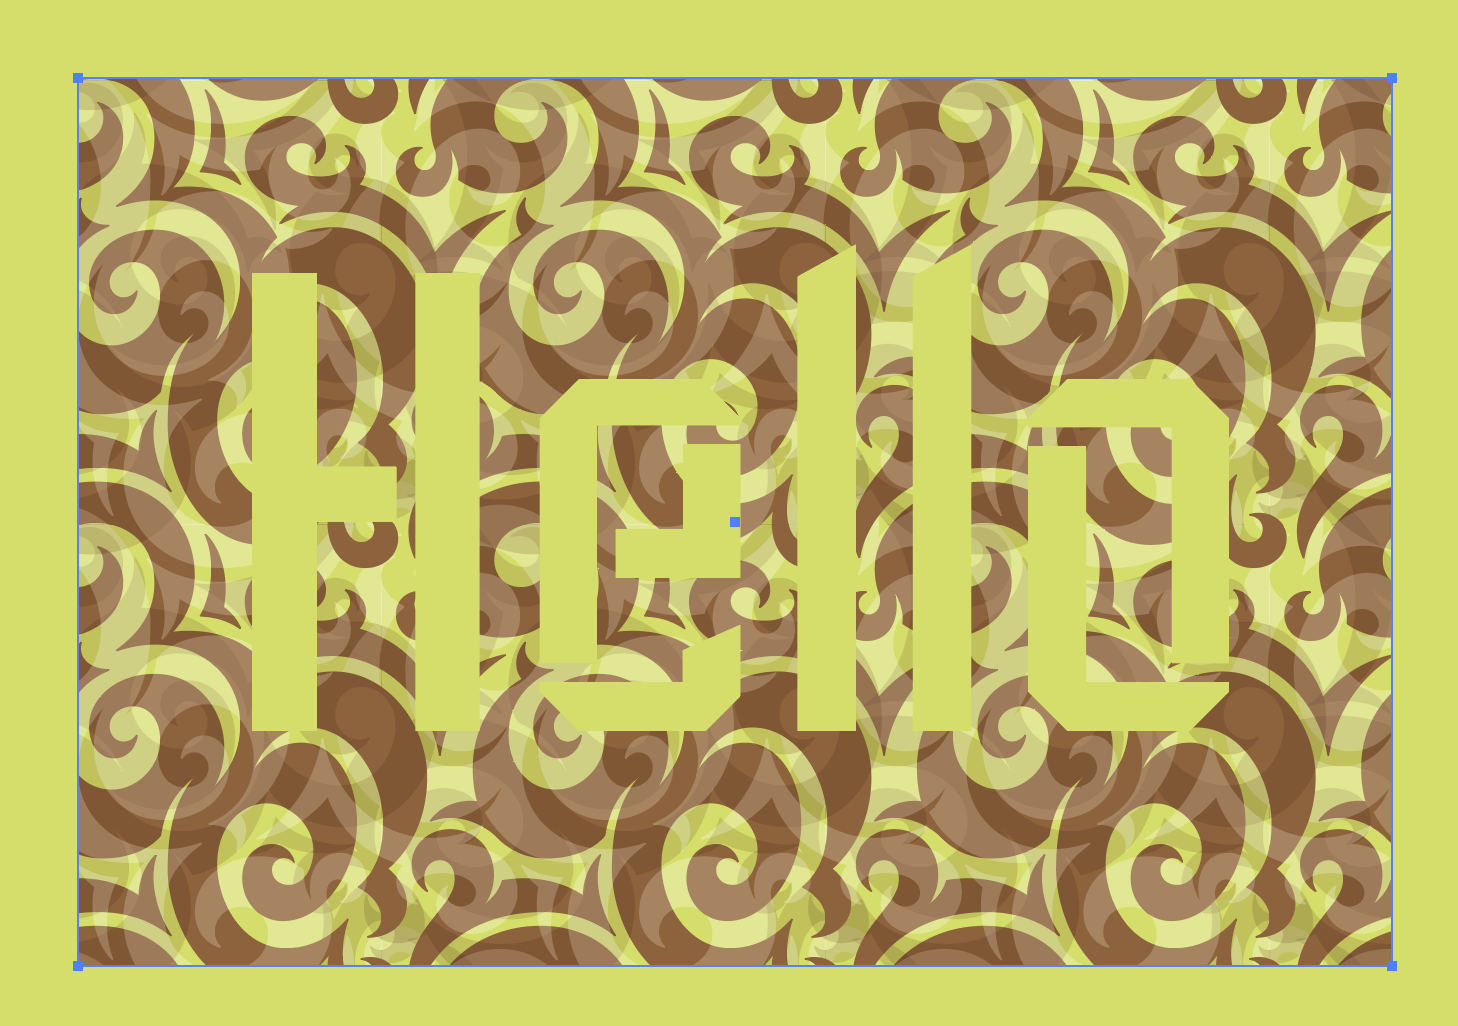
~after pressing「マスク作成」(Create Mask)~
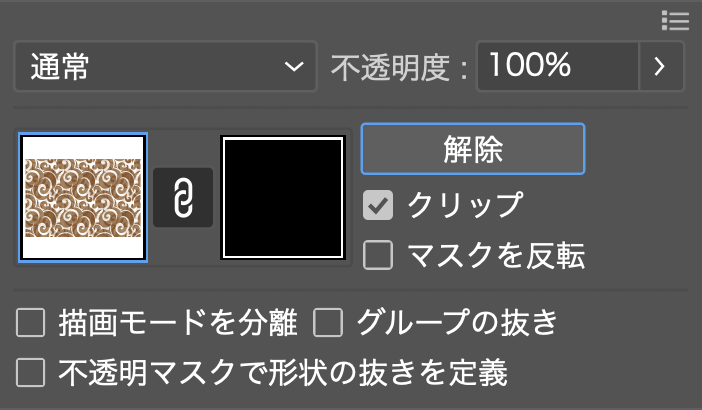
If you select both「クリップ」and「マスクの反転」、the result will be like something similar as the usual clipping mask.


On the other hand, If you unselect both「クリップ」and「マスクの反転」、the object at the front would be "cut out" ,making it transparent.
![]()
It's very helpful for situations like this:
•Not wanting to fully commit in permanently cutting out a shape
•Using it with the combination of text without outlining it
•Cutting out overlapping colours or background behind a translucent object to maintain its transparency
The downside of this method is that you cannot access it by directly selecting it as usual.
Plus, if you're using it with the text, it will not identify it as a text while checking through it normally and you can easily
miss it if you're trying to prepare for an outlined data for submission,
which is a very huge inconvenience to be honest ...!
Therefore, I suggest that it might be wise to look through other related articles about this method when trying it yourself.
Nonetheless, it is still a useful tool when it comes to designing.
Which is why I thought it'd be a good trick to share with other fellow designers out there!
I hope this is a useful tip for someone out there and thanks again for reading all the way through.